Understanding the Basics of Electronic Keypad Systems
Electronic keypads are fundamental devices used in various applications such as security systems, home automation, and access control. They function as input components where each key acts as a switch that, when pressed, completes an electrical circuit. This system involves a matrix layout of rows and columns, making it efficient for scanning multiple keys with fewer microcontroller pins.
Each key press is detected by identifying the unique intersection of a row and a column when the circuit is completed. For instance, a 4×4 keypad matrix can be connected to eight microcontroller pins to detect up to 16 different keys. This method reduces the required I/O pins significantly and simplifies wiring.
However, mechanical keypresses can cause “bouncing,” resulting in multiple false readings. To address this, implementing software debounce techniques or using capacitors for hardware debounce is crucial. These methods ensure that each key press is accurately registered, thereby enhancing the reliability of the keypad system.
Choosing the Right Components for Your Keypad Project
Selecting the appropriate components is vital for a successful electronic keypad project. The key components include the keypad matrix, a microcontroller, resistors, and possibly external debounce circuits.
Keypad Matrices:
These come in various configurations, such as 3×4 or 4×4. The choice depends on the number of inputs needed for your specific application. A larger matrix allows for more keys and thus more functionality.
Microcontrollers:
The microcontroller is the brain of the keypad system. Popular choices include Arduino, Raspberry Pi, and ESP32. Ensure that the microcontroller has enough I/O pins to interface with your keypad matrix. For example, a 4×4 matrix requires eight digital I/O pins.
Resistors and Capacitors:
External pull-up or pull-down resistors help maintain stable electrical states for the keypad. Capacitors can be used in conjunction with resistors to create an effective debounce circuit, ensuring accurate key press detection.
When building the circuit, using a breadboard for prototyping is advisable. For a more permanent setup, a custom PCB can be designed to house all components neatly and securely. Additionally, if your project requires remote key management or wireless control, consider integrating communication modules such as Wi-Fi or Bluetooth.
Programming and Uploading Firmware to Your Keypad
With the hardware set up, the next step is to write and upload the firmware to the microcontroller. Most development platforms, like Arduino IDE, come with libraries that simplify keypad interfacing.
Library Setup:
Begin by including the keypad library in your code.
Defining the Keypad Layout:
Specify the number of rows and columns, and initialize their pin connections
Uploading the Code:
Connect the microcontroller to your computer and upload the code using the development environment (e.g., Arduino IDE). Ensure the correct board and port settings are selected to prevent upload errors.
Testing and Debugging Your Electronic Keypad
Post firmware upload, testing the keypad to ensure it functions correctly is crucial. Utilize the serial monitor in your development environment to observe keypresses.
Basic Functionality Test:
Press each key and confirm that the correct character is displayed on the serial monitor. If keys produce incorrect characters or fail to register, check the wiring of your keypad matrix and ensure the software configuration matches the hardware layout.
Debouncing Test:
Ensure each key press is registered only once. If multiple signals are detected for a single press, revisit your debounce logic in the firmware or employ hardware debounce solutions using capacitors.
Integration Test:
Finally, integrate the keypad into its intended application and verify that it performs seamlessly within the full system. This step may include interfacing with other hardware, sending data wirelessly, or triggering specific actions based on key presses.
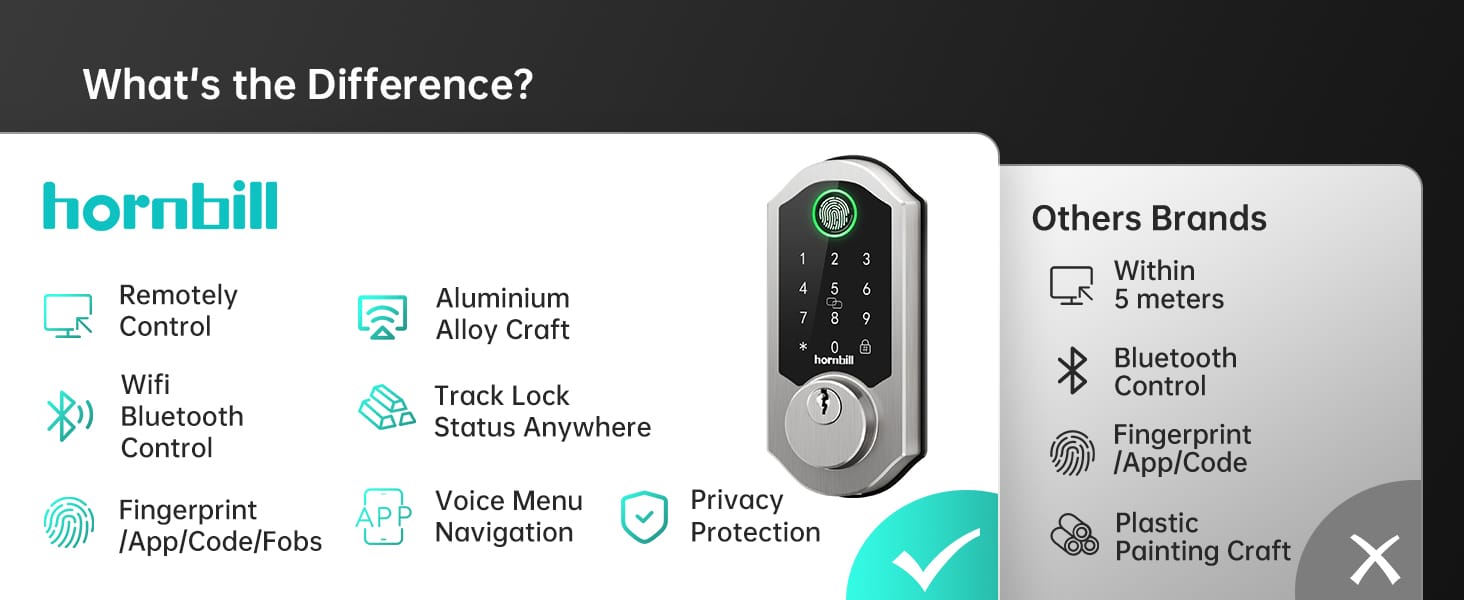
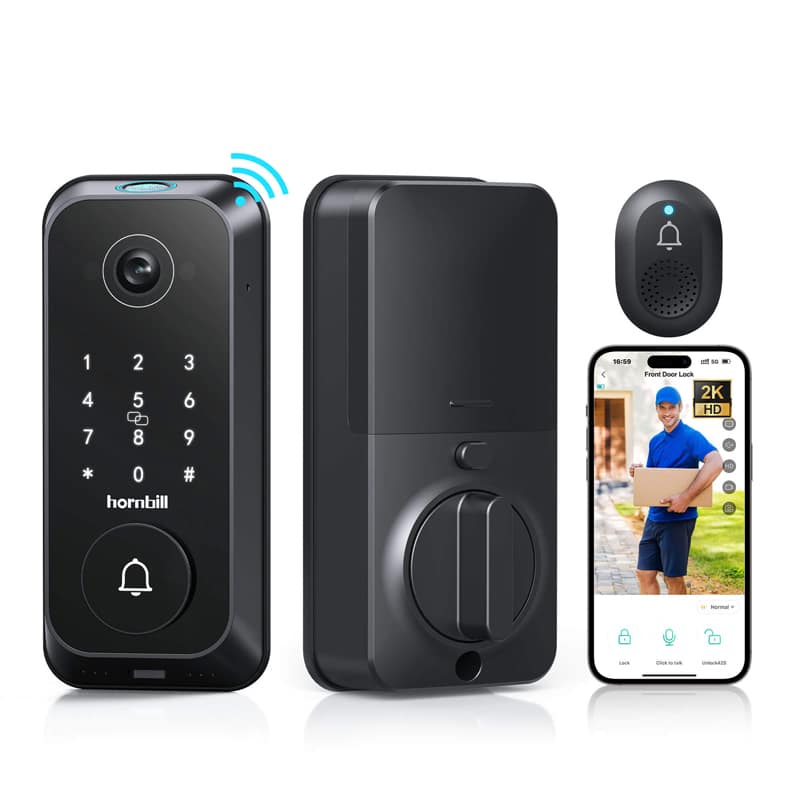
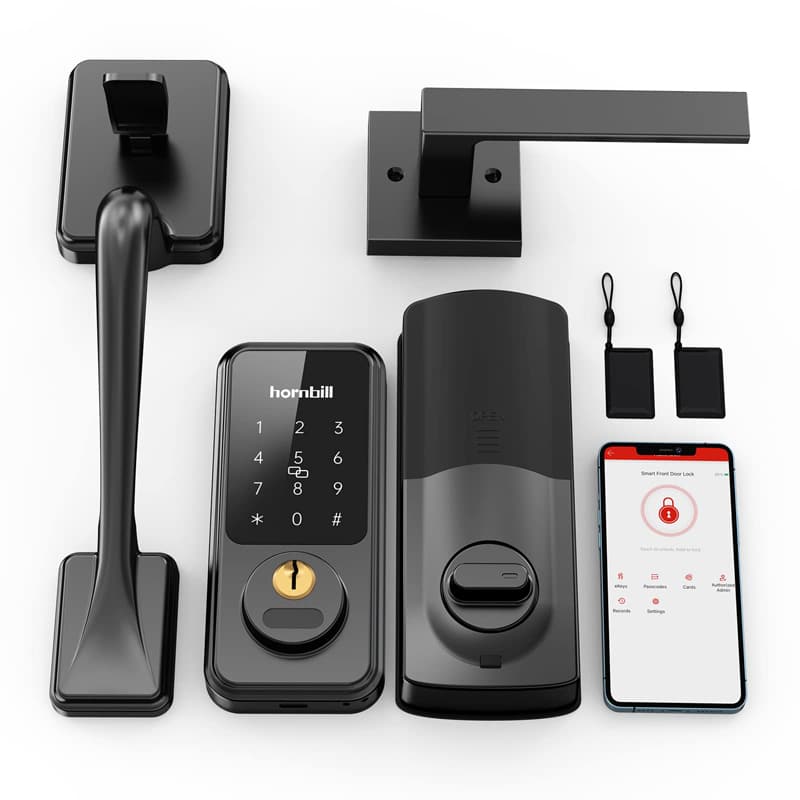
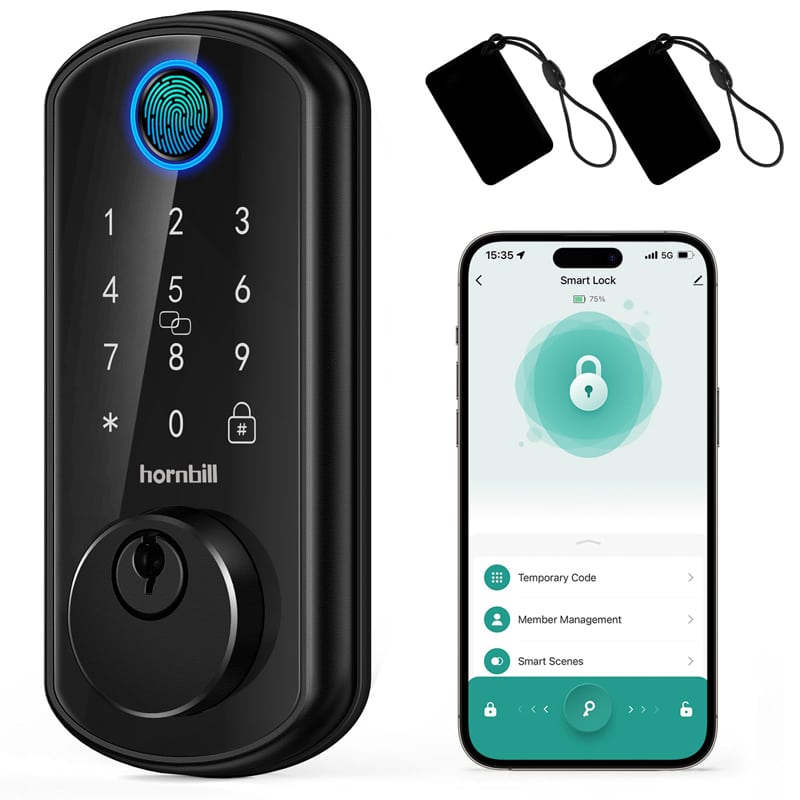
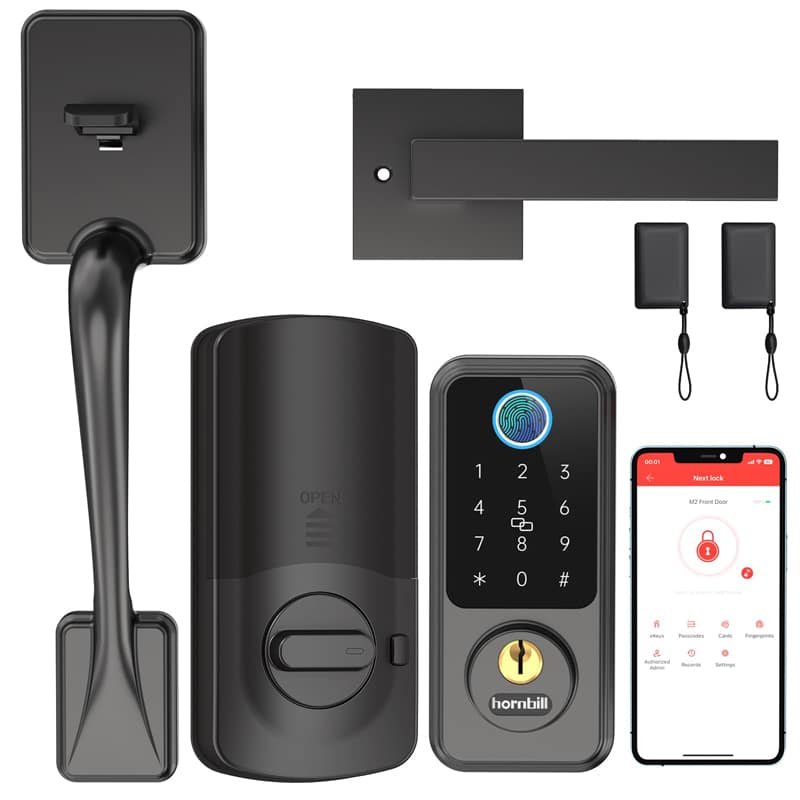
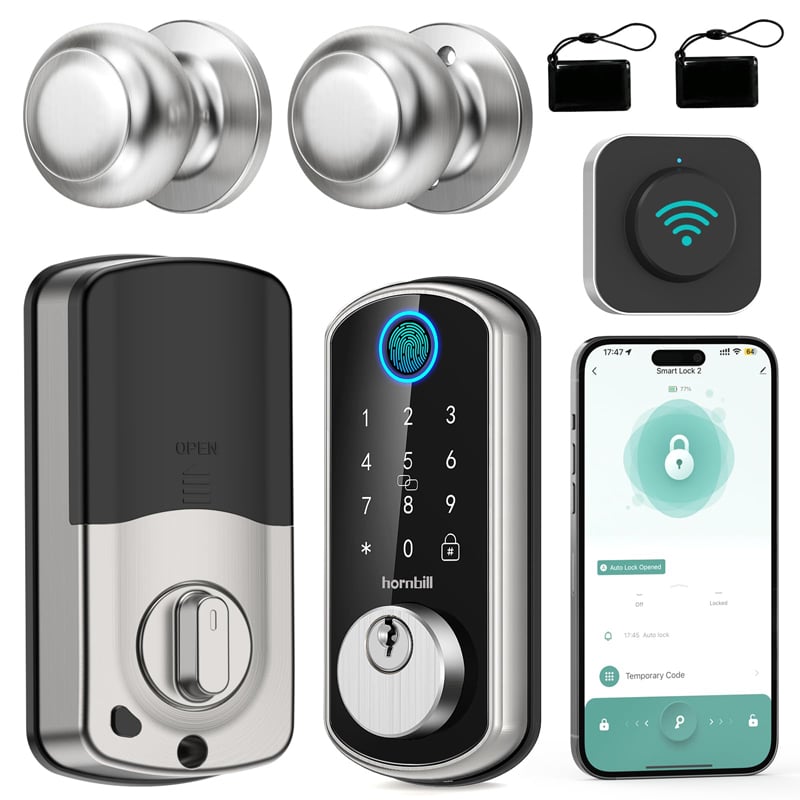
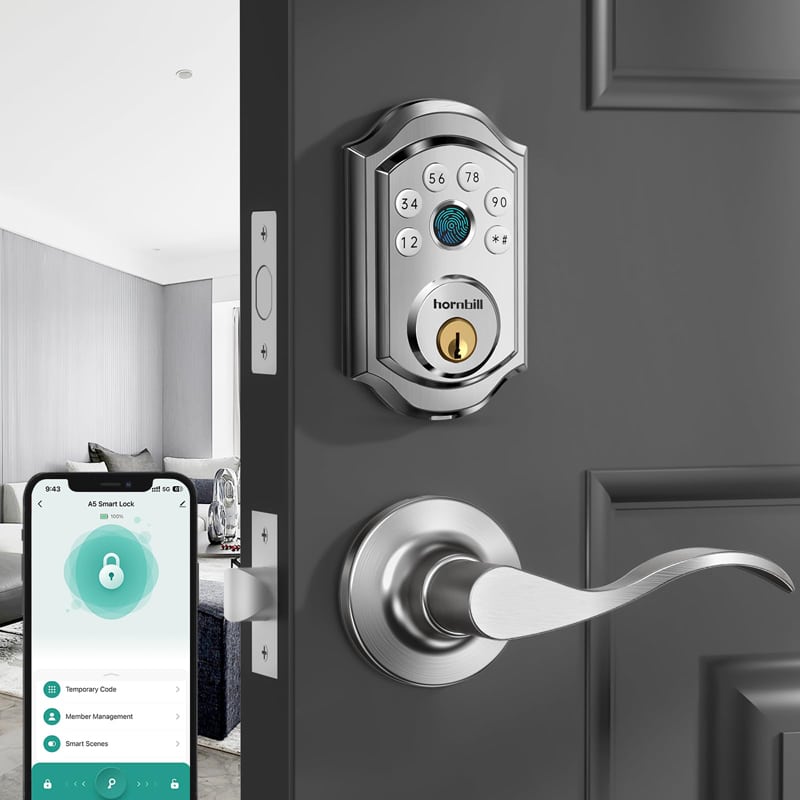
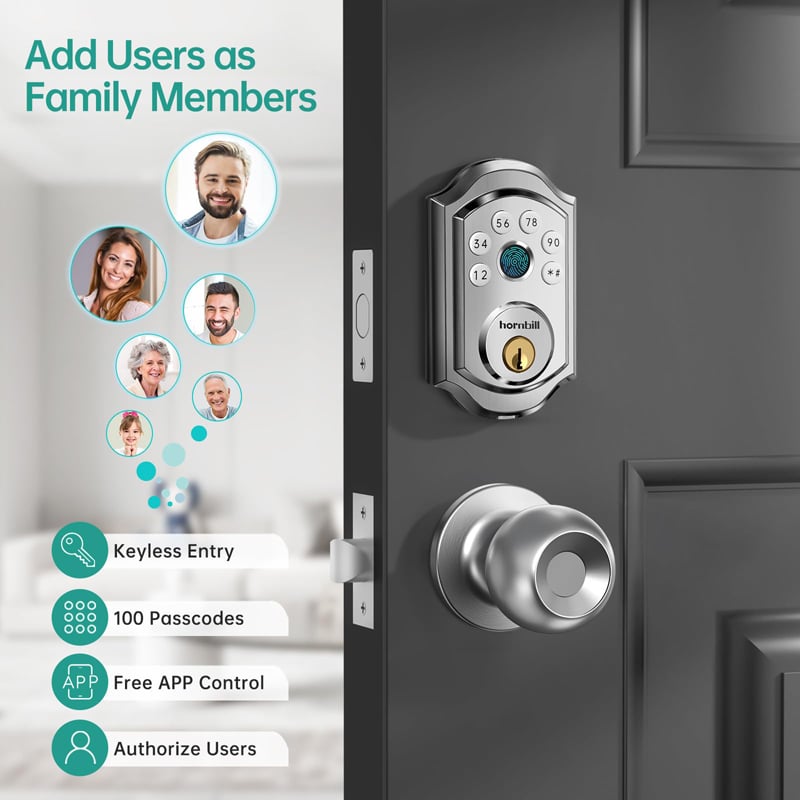
Hornbill Electronic Keypad
As an example of a high-quality electronic keypad, the Hornbill Electronic Keypad stands out for its versatility and security features. Hornbill specializes in smart home security solutions, and their electronic keypads are designed for ease of use and reliability.
The Hornbill keypads are equipped with advanced features such as fingerprint recognition, mobile app control, and real-time monitoring. These features make them ideal for modern smart homes, providing a secure and convenient method for keyless entry.
Moreover, the Hornbill Electronic Keypads boast robust build quality, ensuring durability and long-term performance. Their intuitive design allows for straightforward installation and programming, making them accessible even for those new to electronic keypad systems.
In summary, if you are looking for a reliable and feature-rich electronic keypad, Hornbill offers some of the best electronic keypad door locks on the market. Their products not only enhance security but also bring convenience and peace of mind to your smart home setup.