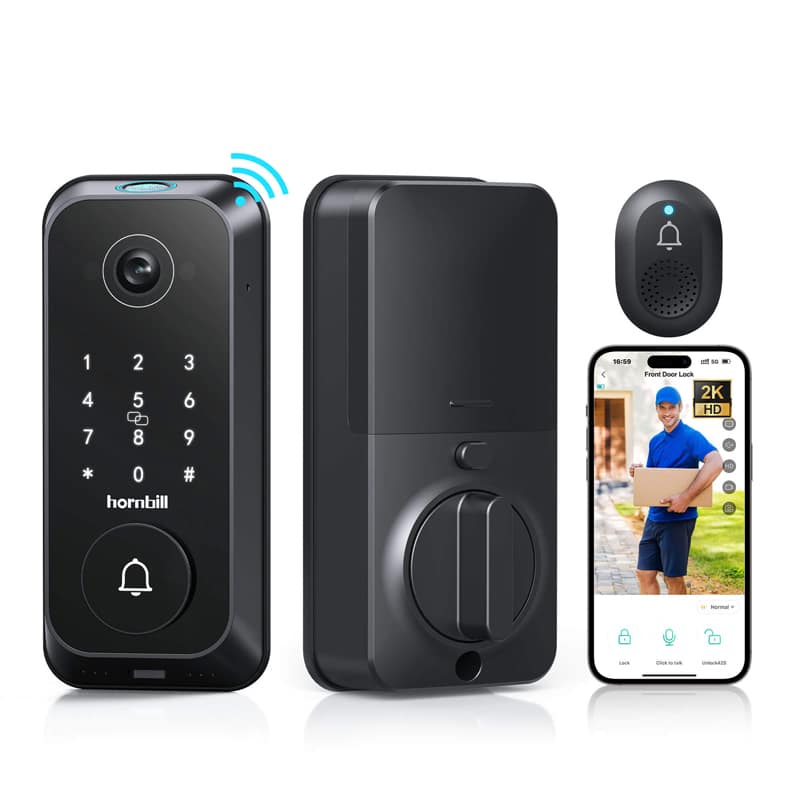
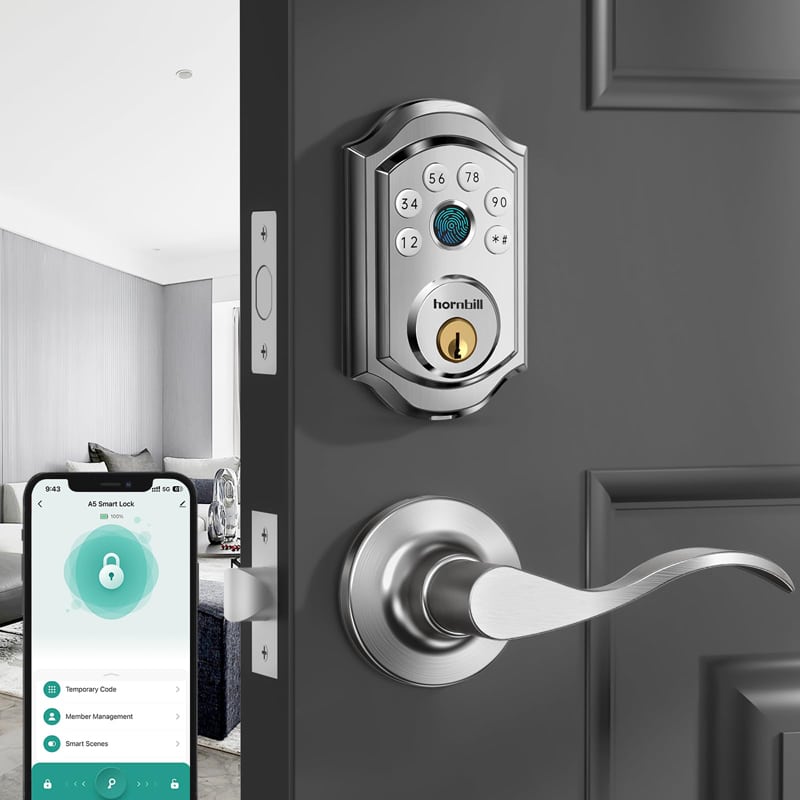
The allure of video doorbells is readily apparent: vigilant monitoring of delivered packages and timely alerts when visitors arrive. The installation of such devices, however, can be a complex endeavor, contingent on the type of video doorbell camera purchased. In this guide, our team will assist you in the installation of the T1 Video Doorbell.
Step 1. Adjust and Install the Deadbolt
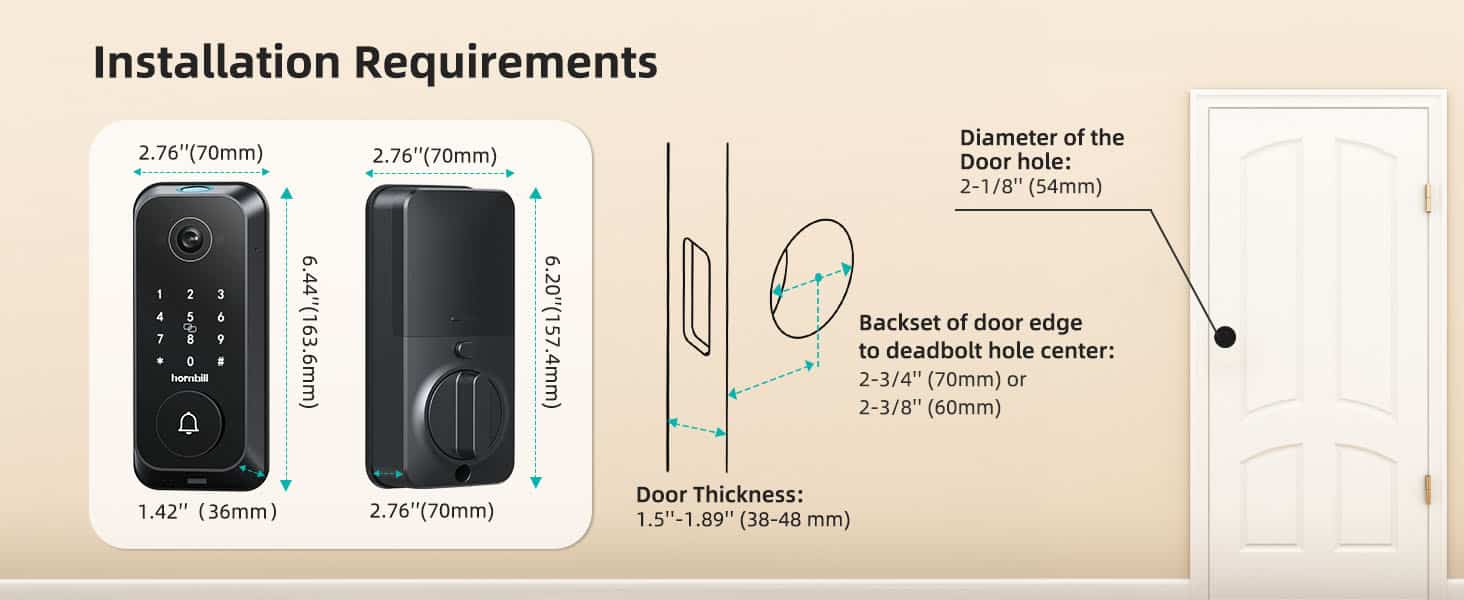
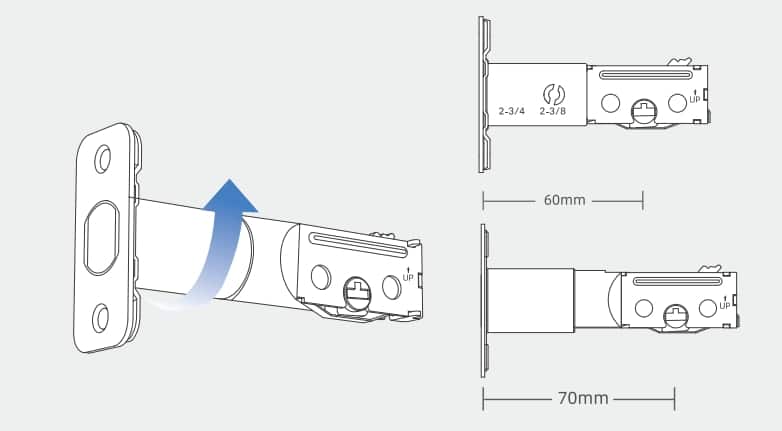
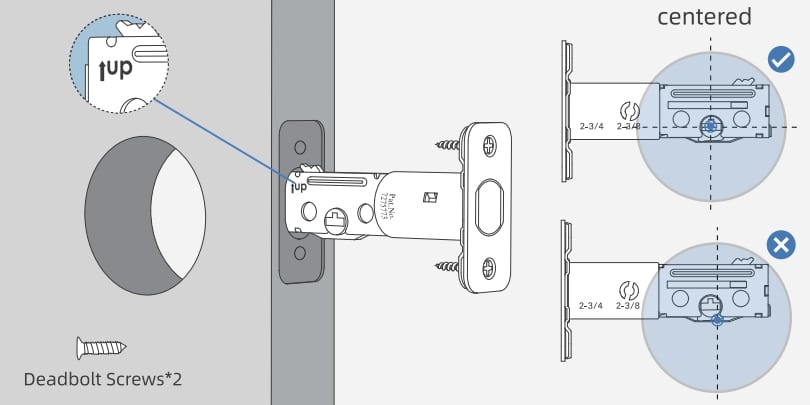
For doors possessing a 2⅜-inch backset, the doorbell camera can be installed without modification. For those with a 2¾-inch backset, rotate the deadbolt upwards to extend its length. Insert and secure it into the door frame, ensuring that the word “UP” on the deadbolt is oriented correctly and that the deadbolt remains in a retracted (unlocked) position.
Step 2. Install the Strike Plate
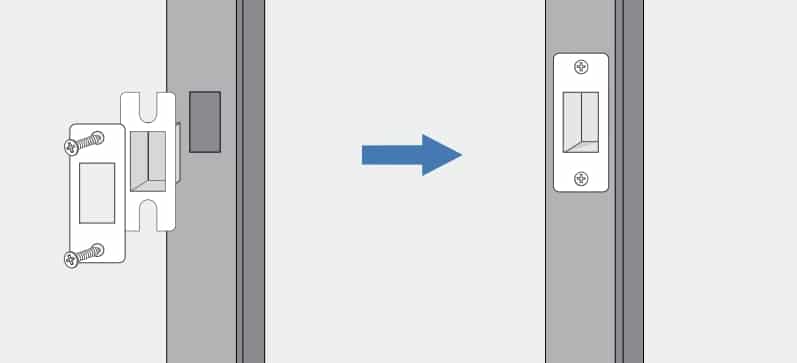
Secure the strike plate in place using two screws.
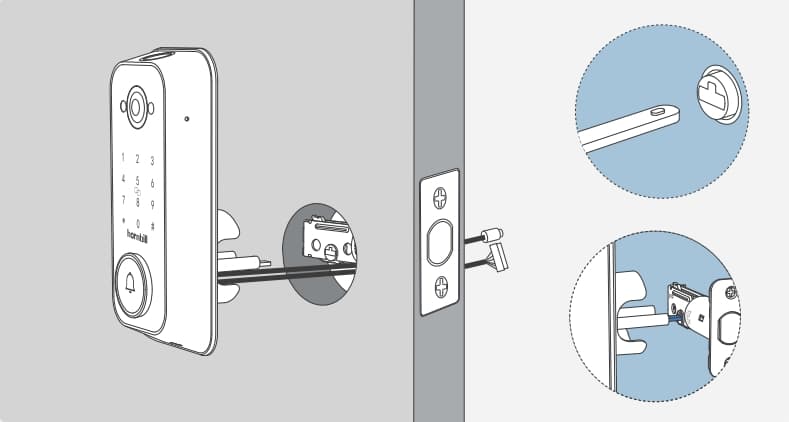
Step 3. Install the Exterior Lock
Before installation, ensure that the lock spindle is positioned as illustrated and that the protrusion on the end of the locking spindle faces upwards. Test the spindle by rotating it several times to confirm the smooth extension and retraction of the deadbolt. Keep the video smart lock’s spindle horizontal, and guide the IC wire and Wi-Fi cable beneath the deadbolt.
Please note that the deadbolt should be in unlocked status (retracted) during the exterior lock installation. Don’t insert a physical key at this time.

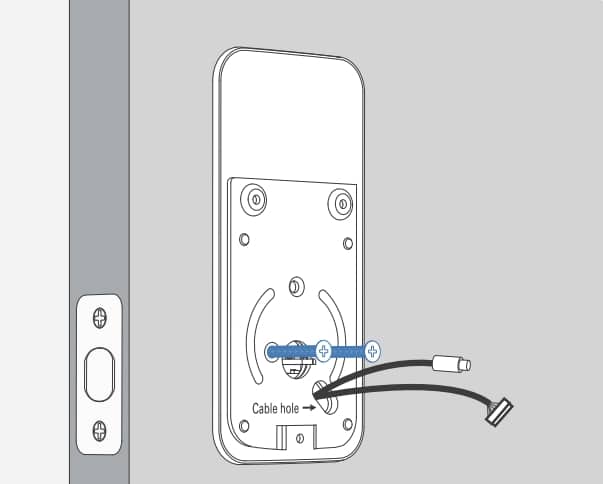
Step 4. Install the Mounting Plate
Pass the lock spindle through the central hole, and feed the IC wire and Wi-Fi cable through the hole in the metal plate, which should be positioned on the right side. Secure the mounting plate using two screws, ensuring proper alignment. It is crucial to keep the exterior lock aligned with the door surface while installing the mounting plate to ensure robust fixation.
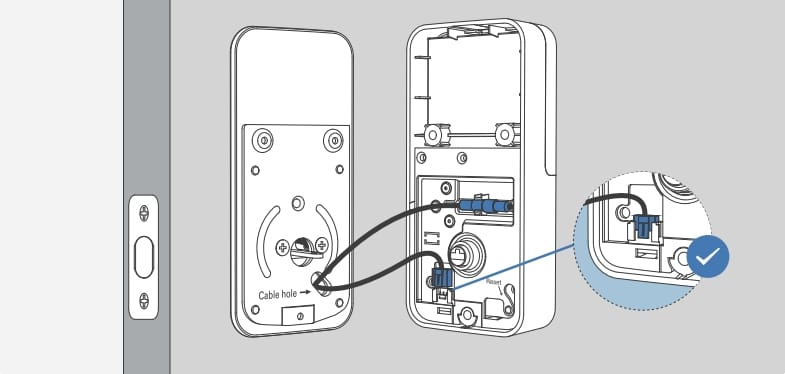
Step 5. Install the Interior Lock
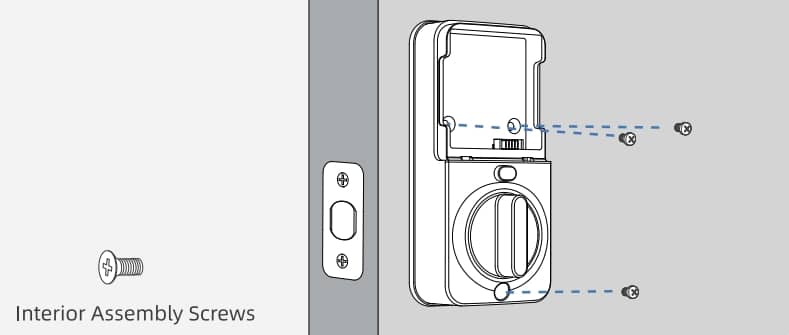
Connect the IC wire to the designated port and the WiFi cable to the connector on the interior lock. Align the lock spindle with the groove on the lock knob and insert it. Secure the interior lock with screws. If the IC wire and WiFi cable are too long, neatly tuck them into the hole in the mounting plate to maintain order.
Step 6. Install the Battery
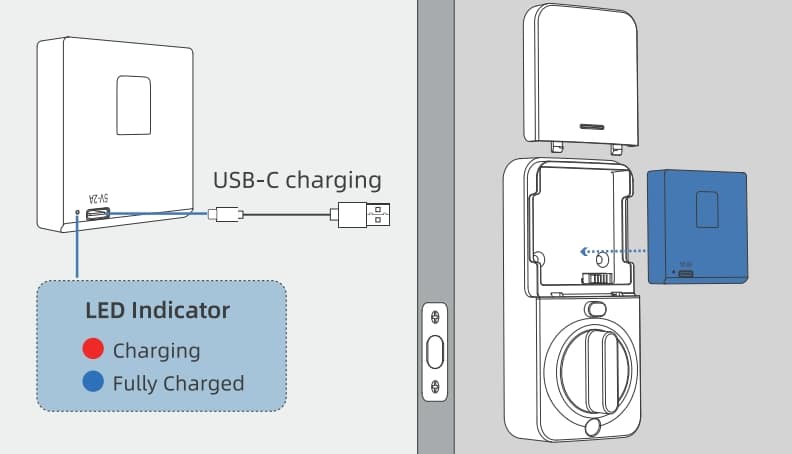
Align the groove on the battery with the port located in the bottom right corner of the battery compartment in the interior lock.
- The product package includes two rechargeable 2500mAh lithium-ion batteries with USB-C charging ports.
- Each battery comes pre-charged to between 40% and 60% capacity.
- It is recommended to fully charge the batteries before initial use.
- A red light will indicate charging, which will turn blue once the battery is fully charged (typically, this takes 5-6 hours per battery). Do not charge the battery while installed in the door lock to prevent overheating and potential performance issues.
- A 5V-2A charger is required for charging.
Step 7. Test the Lock
After the installation, it’s necessary to test the smart door lock to check whether the lock is installed correctly or not. Please follow the steps below:
- Keep the door open.
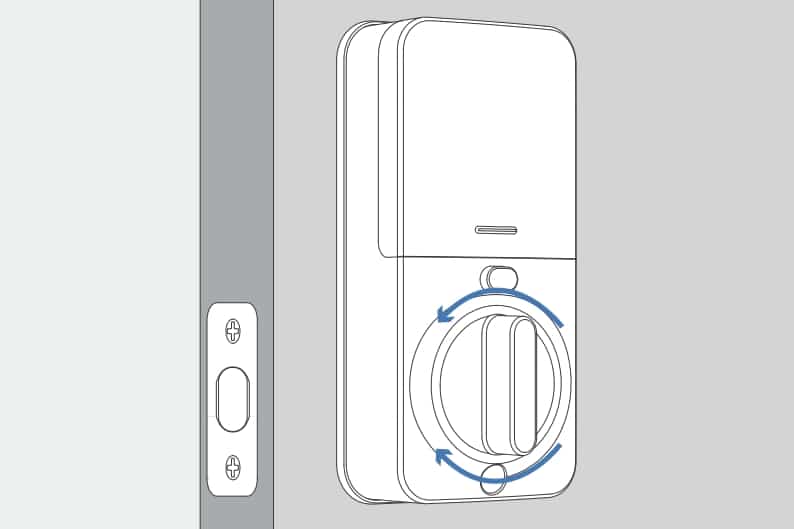
- Turn the knob several times to verify smooth extension and retraction of the deadbolt.
- Ensure the knob is vertical in the unlocked state and horizontal in the locked state.
Step 8. Pair the Doorbell Chime
For auditory alerts of visitor arrivals, install the compatible doorbell chime following these steps:
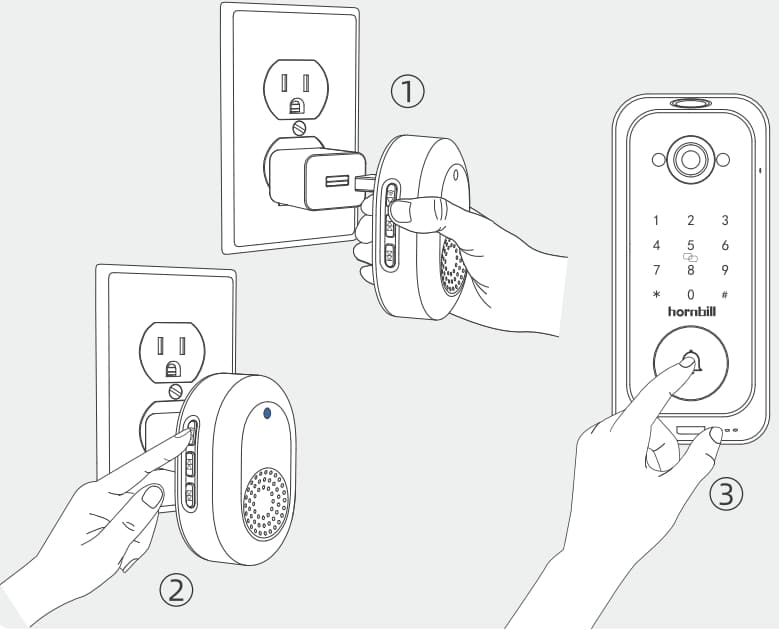
- Connect the Doorbell Chime to a power source with a 5V-2A USB port.
- Press and hold the volume button on the Doorbell Chime for 5 seconds until the blue light flashes, indicating pairing mode.
- While the Doorbell Chime is in pairing mode, press the button on the front of the Smart Deadbolt. A sound from the Doorbell Chime and the cessation of the blue flashing light signifies a successful pairing.
- Repeat these steps to pair the Doorbell Chime with up to five different smart deadbolts, ensuring that the distance between each lock and the Doorbell Chime does not exceed 49 feet (15 meters).
By following these detailed instructions, you will seamlessly install and operate your Hornbill T1 Video Smart Lock, providing enhanced security and convenience for your home.
Installation Finished
By following these detailed instructions, you will seamlessly install and operate your Hornbill T1 Video Smart Lock, providing enhanced security and convenience for your home.

