1. Introduction
Welcome to the Next Lock Smart Home Integration Guide. In this article, you’ll learn how to pair your G2 Gateway with the Next Lock App for seamless remote control of your smart lock, and then extend that control to Amazon Alexa, Google Home/Assistant, and your PC. Whether you’re setting up your gateway for the first time or enabling voice-activated unlocking, these step-by-step instructions—with clear, labeled screenshots—will have your smart lock fully integrated into your connected home in just a few minutes.
2. Pair the Gateway
For remote control, add the lock to the Next lock App first, and then proceed with the steps below.
Step 1: Plug in the Gateway, the blue indicator remains solid and the red indicator flashes slowly.
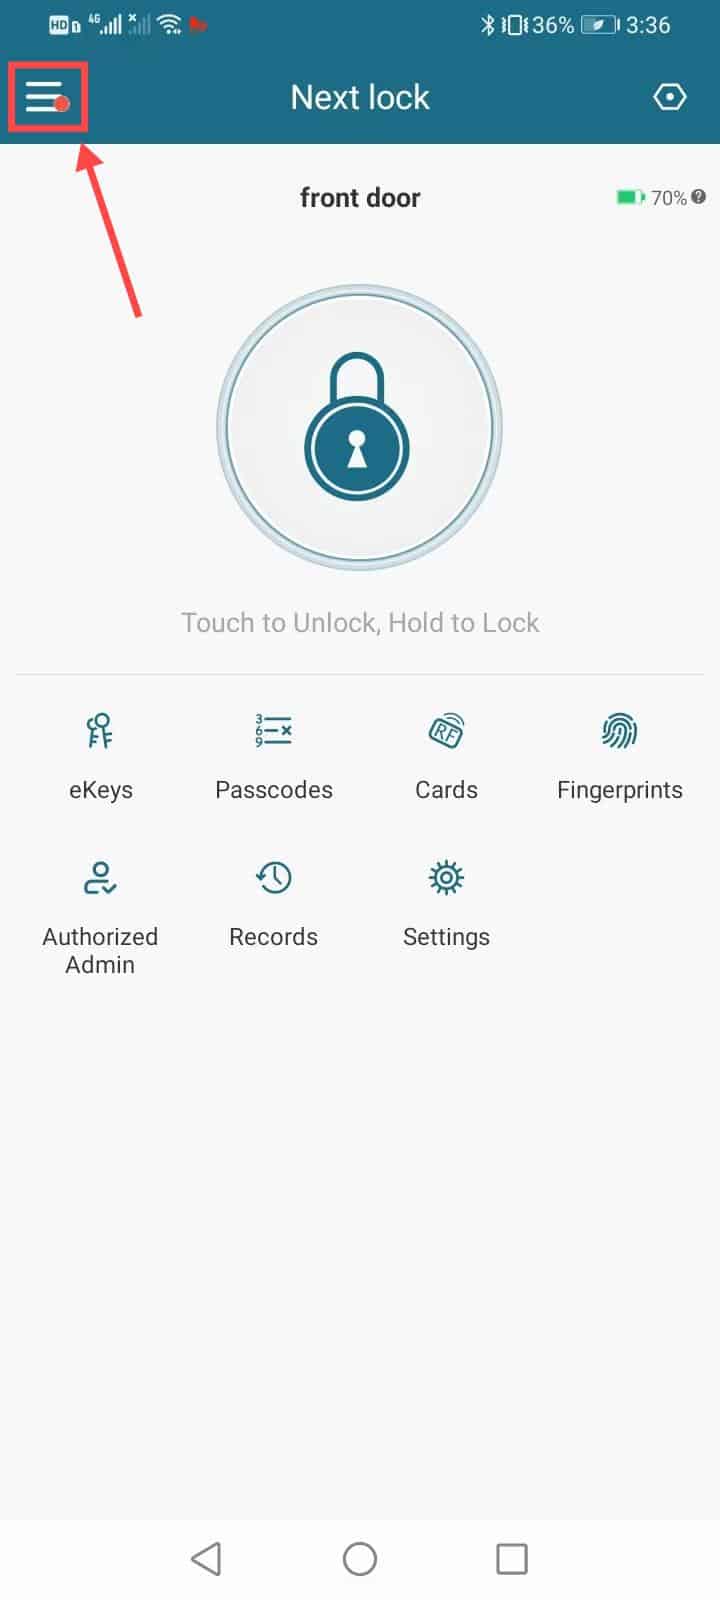
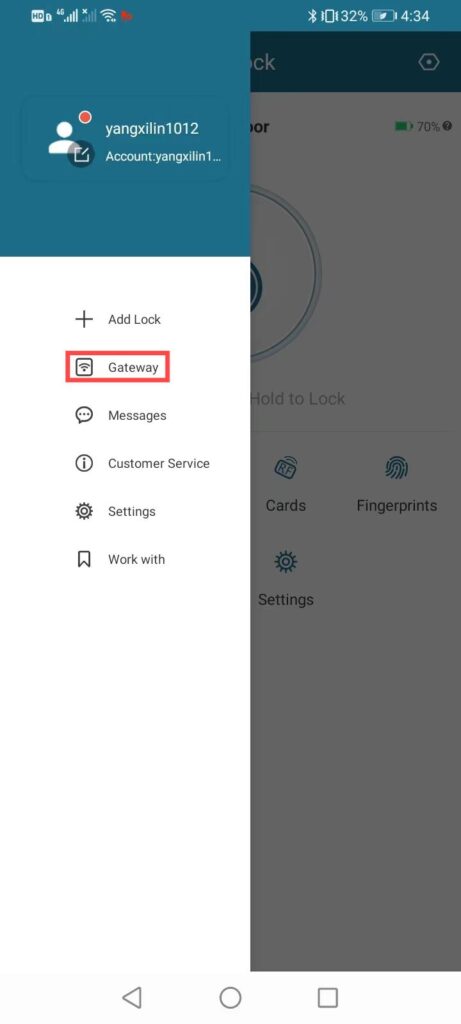
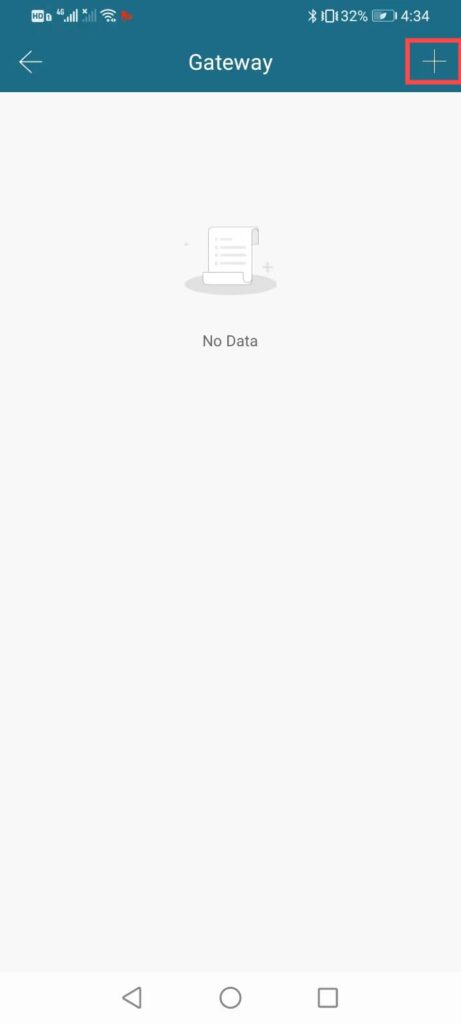
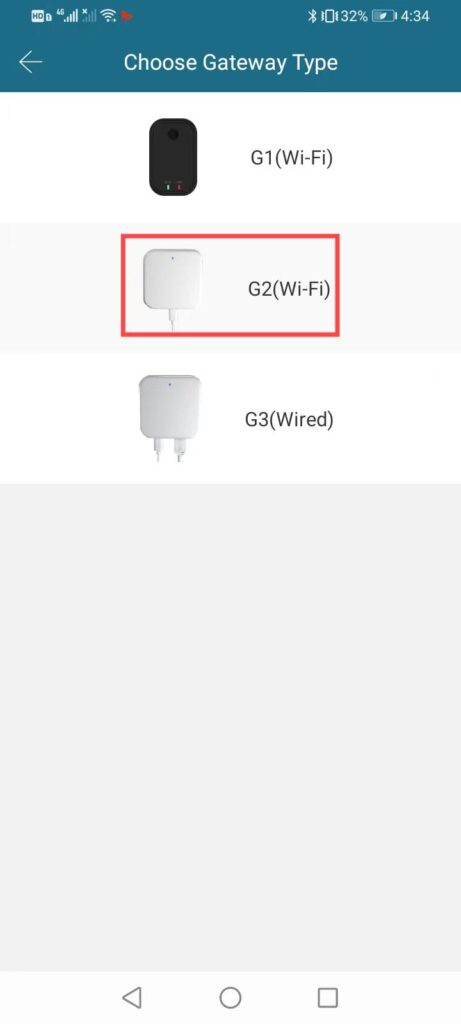
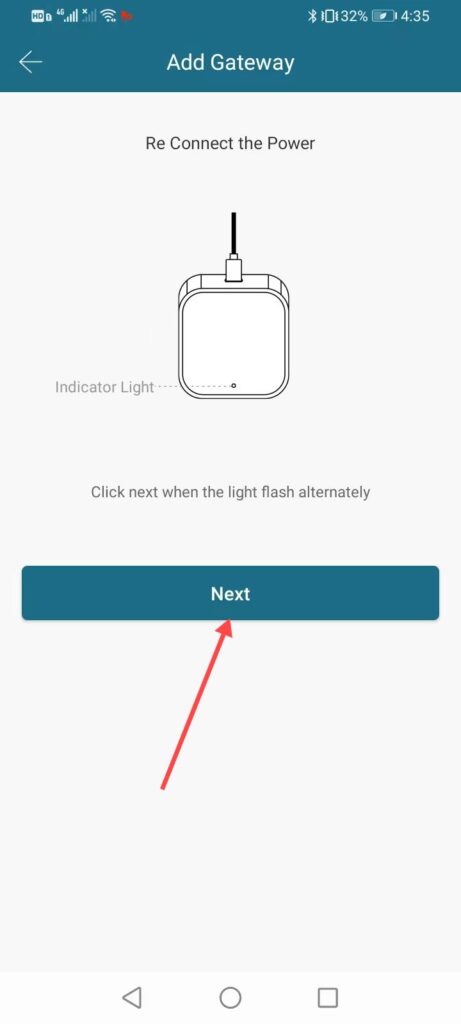
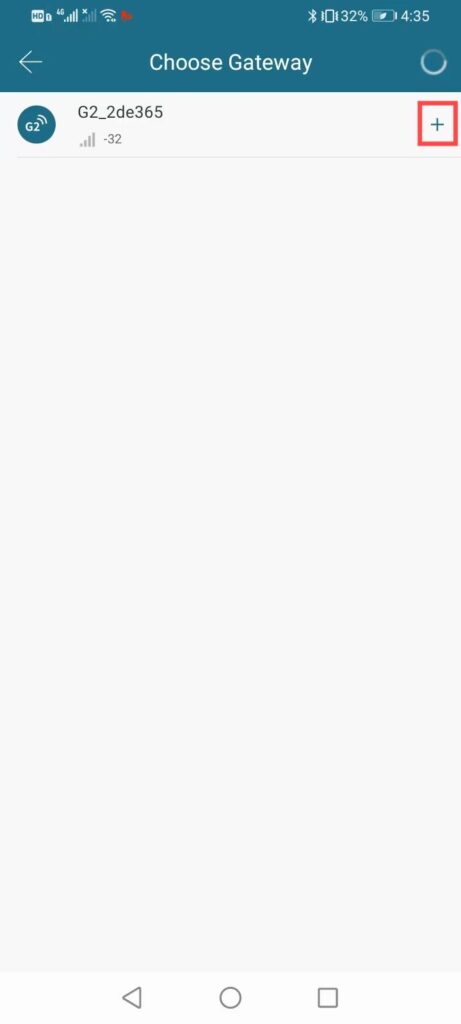
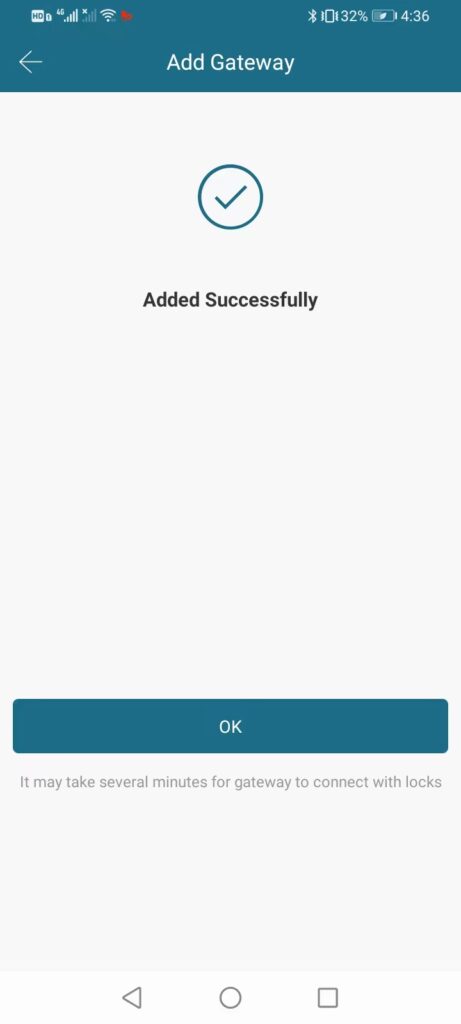
Step 2: Add the Gateway to the App: At Next lock homepage, tap the icon in the upper left (Pic 1) > Tap on “Gateway” (Pic 2) > Tap “+” icon in the upper right (Pic 3) > Choose G2(Wi-Fi) (Pic 4) > Click “Next” after your Gateway flashes blue slowly (Pic 5) > Tap the “+” icon to add the Gateway (Pic 6)> Wait for the Gateway to pair successfully (Once the Gateway is added to the App, the indicator light will flash slowly for 2-3 seconds).
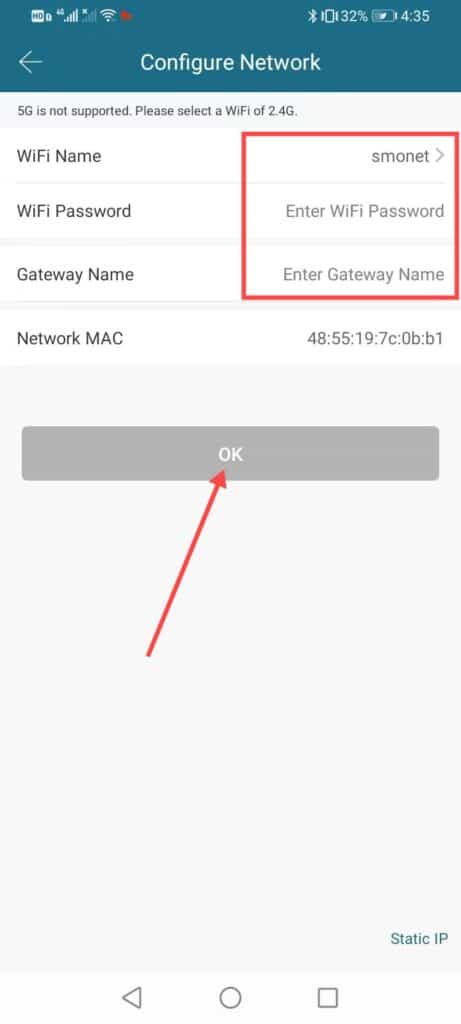
Step 3: After adding the Gateway, you can configure network by entering Wi-Fi Password and Gateway Name and tap “OK” (Pic 7).
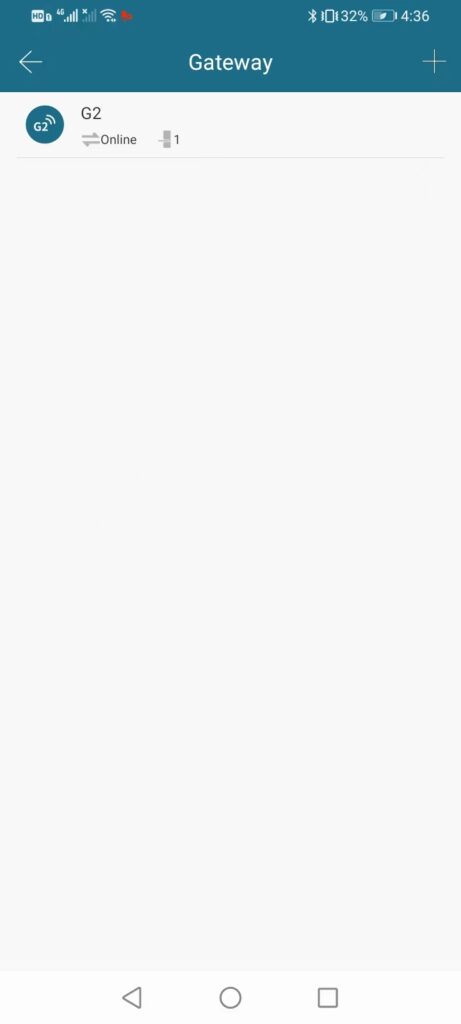
Step 4: The lock is connected to the Gateway now (Pic 8). You can check the Gateway status at Gateway page (Pic 9).
If you cannot pair the Gateway, check the following steps:
①Check if the Gateway signal is strong, if not, move the Gateway closer to the lock.
②Make sure the distance between the Gateway and the lock is within 16 feet.
③Make sure your phone and the Gateway are connected to the same Wi-Fi (The Gateway only works with 2.4 GHz Wi-Fi).
NOTE: If you have 5Ghz Wi-Fi, you can set and add 2.4 GHz Wi-Fi by dual band router.
3. Enable Amazon Alexa (G2 Gateway Required)
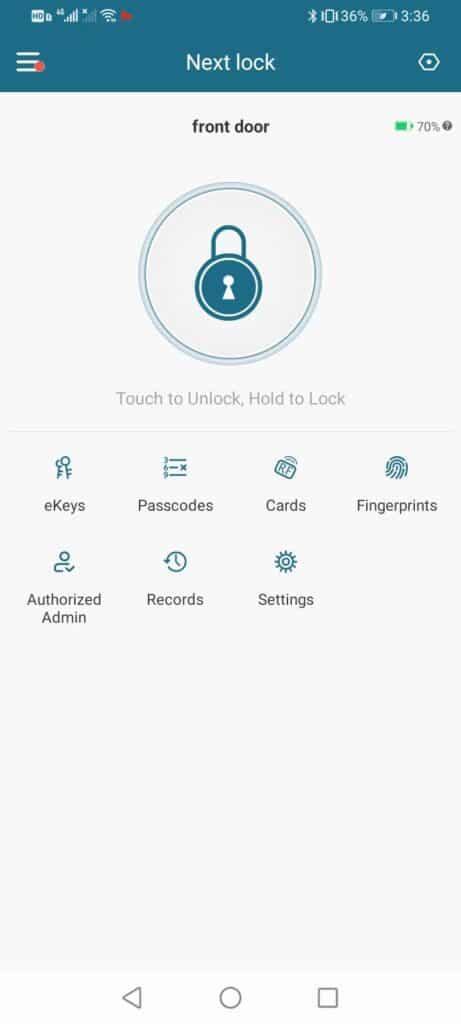
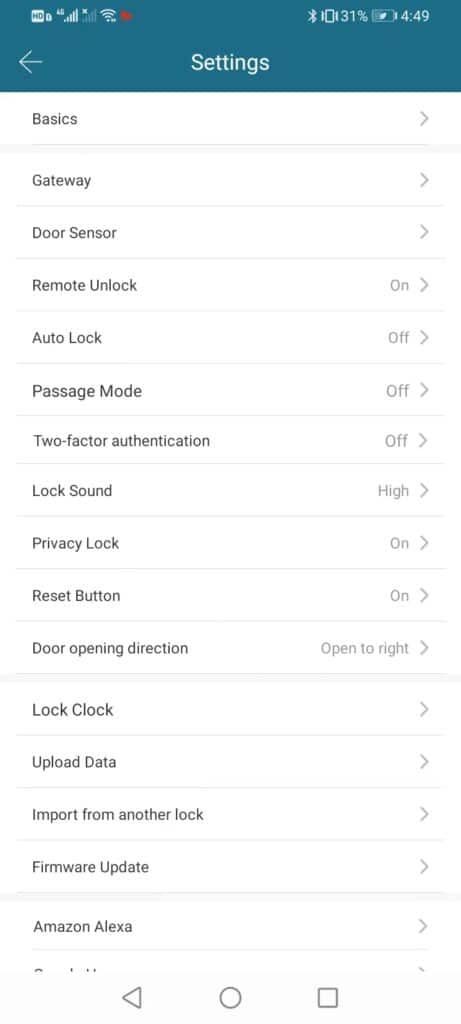
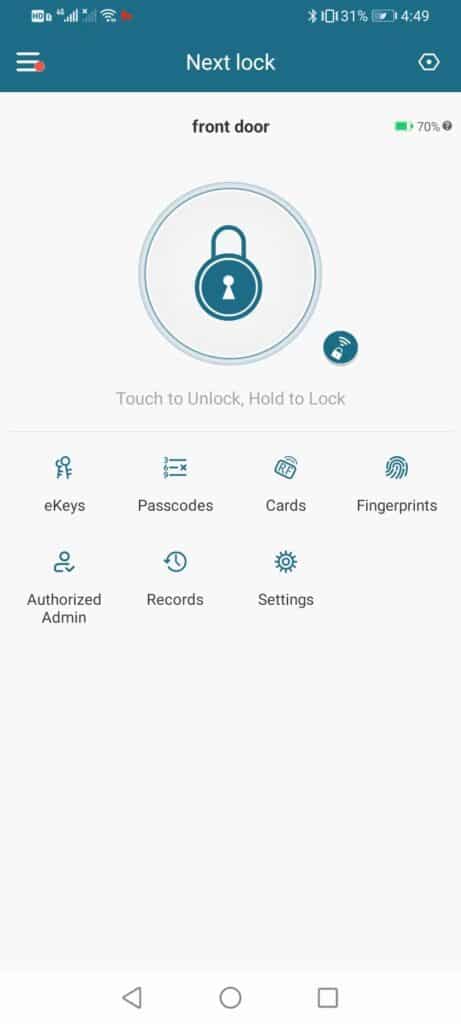
Step 1: Ensure the lock and the Gateway are paired (Refer to “Pair the Gateway”). > Click the “Settings” icon at Next lock homepage (Pic 10). > Turn on Remote Unlock (Pic 11). > You can see Remote Unlock icon at homepage (Pic 12).
Step 2: Download Amazon Alexa App from either Google play or App Store, then launch and login your Amazon Alexa account using your Amazon account.
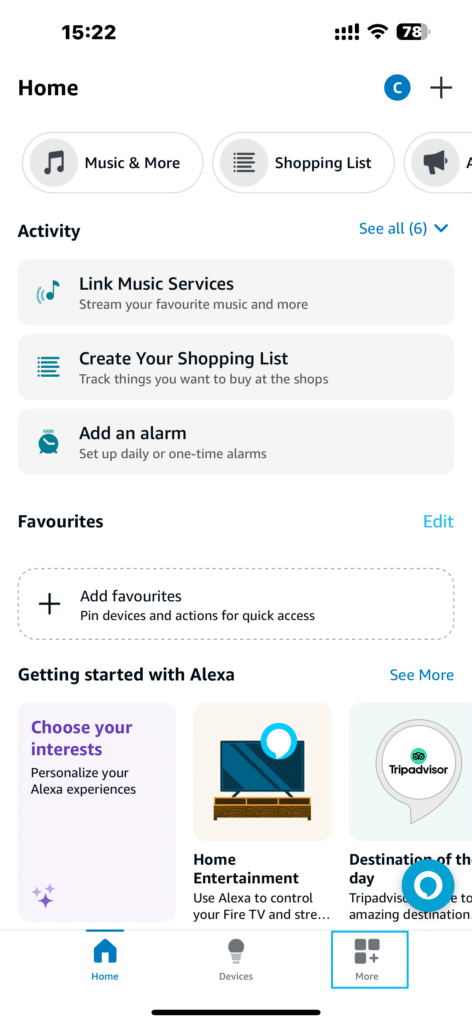
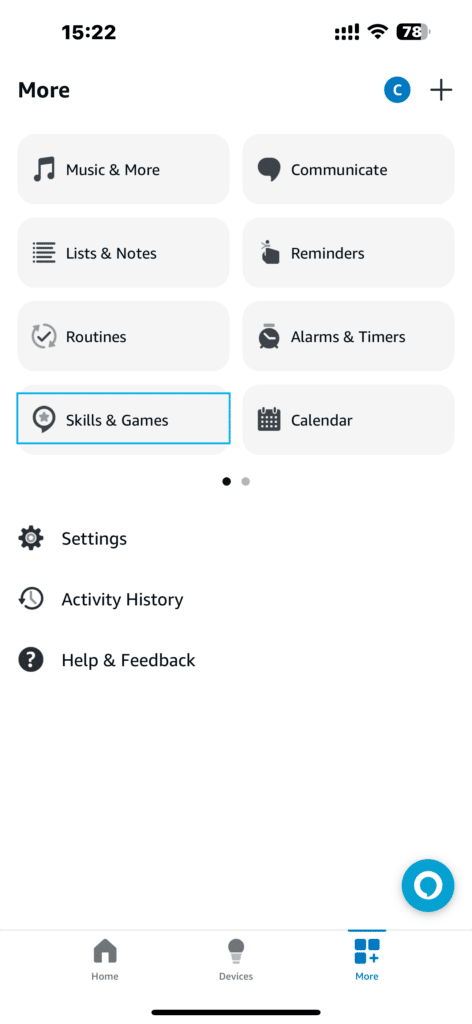
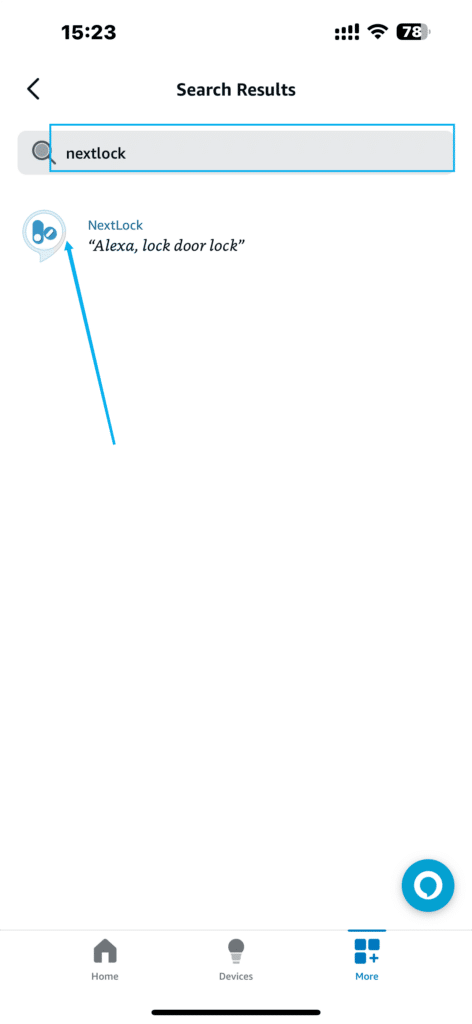
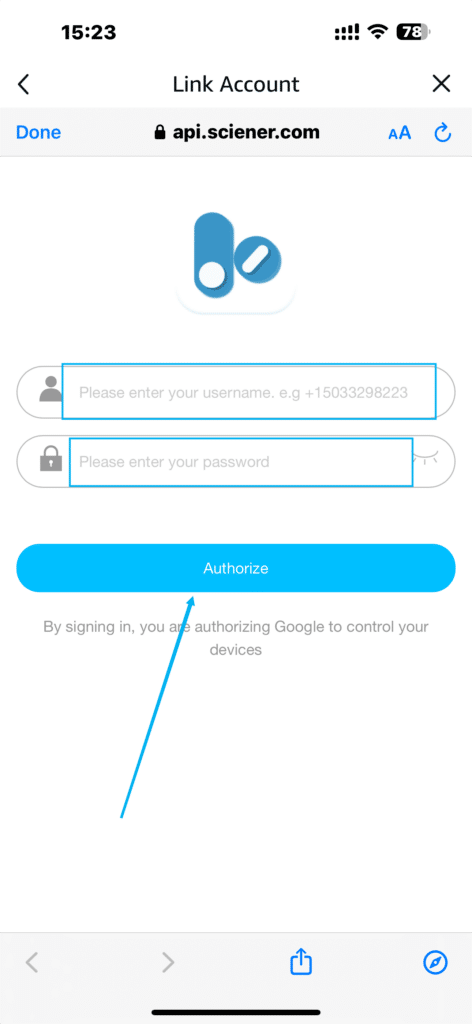
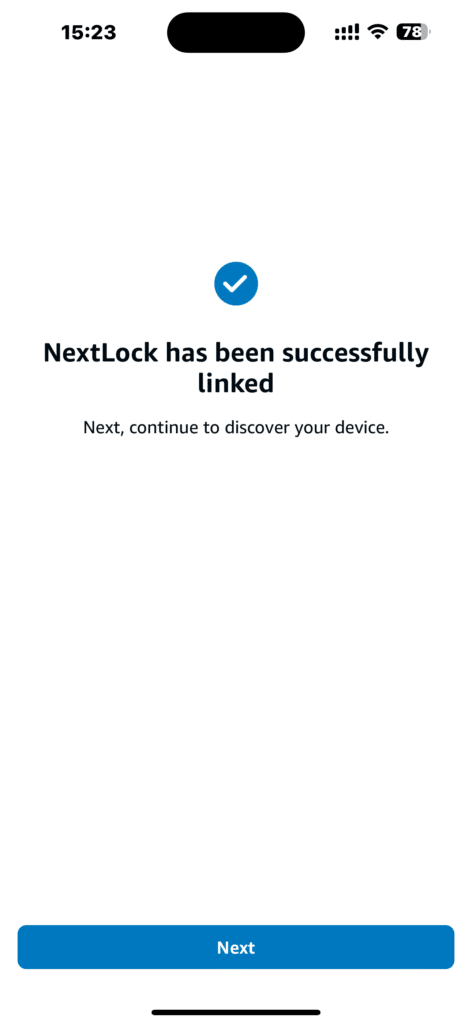
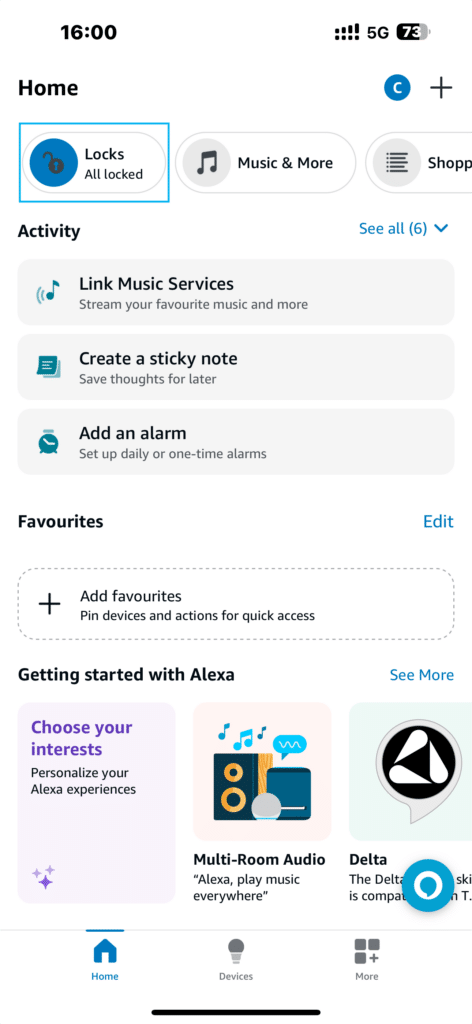
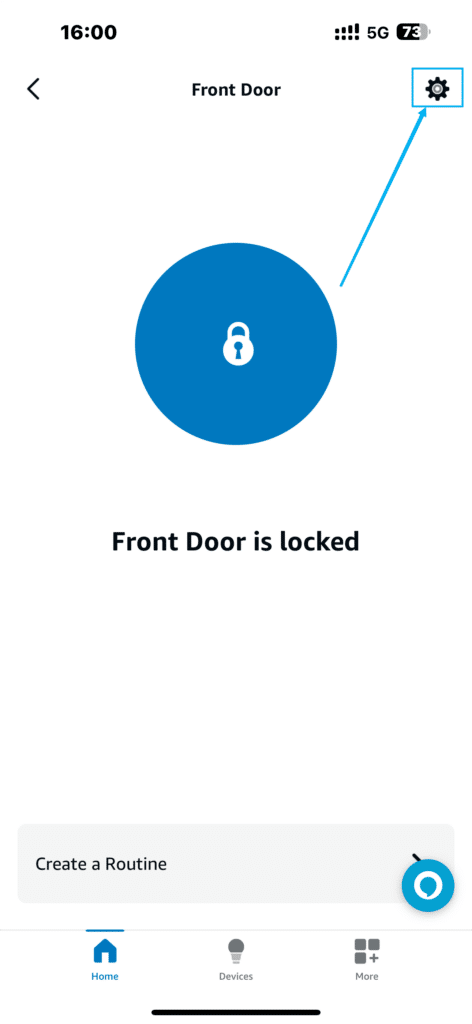
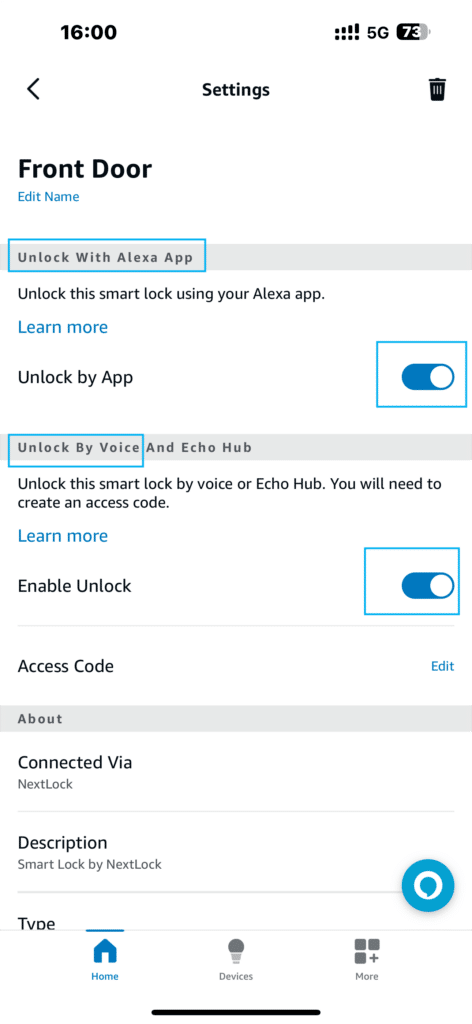
Step 3: Tap “More”(Pic 13). > Choose “Skills & Games” (Pic 14). > Searching for “nextlock” taping searching icon (Pic 15). > Enter NextLock page and click “ENABLE TO USE” (Pic 16). > Sign in your Next lock account to authorize (Pic 17). > Next lock account linked successfully to Alexa (Pic 18). > Close and then tap “Home” then choose “Locks” icon (Pic 19). > Click in and choose the upper right “setting” icon (Pic 20). > Switch on “Unlock by App” and “Enable Unlock” (Pic 21). > Setting finished.

4. Enable Google Home/Google Assistant (G2 Gateway Required)
Step 1: Make sure you have installed Google Home App and hub.
Step 2: Click the “+” button on the upper left of the App to setup device.
Step 3: In setup device page, choose “Works with Google”, to manage accounts page.
Step 4: Search for “ScienerSmart”, and enter your Next lock account in the authorize page.
Step 5: Set Google Home Security Code in Next lock App. You will be asked for this code when unlock with google home.
5. Enable PC Operation (G2 Gateway Required)
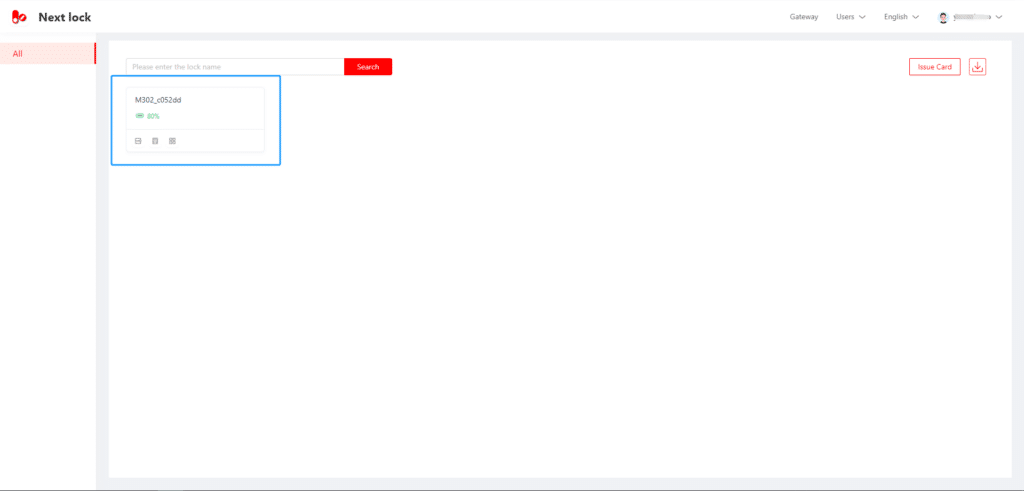
Step 1: Log in nextsmartlock.com using your Next lock App account.
Step 2: After logging in, you can remote control your door lock now (Pic 22).
6. Conclusion
Congratulations—you’ve now successfully paired your G2 Gateway, configured remote unlock, and linked your Next Lock system to Alexa, Google Home, and the web portal. With these integrations in place, you can enjoy effortless, secure access to your home from anywhere, using the platform that’s most convenient for you. If you ever need assistance or wish to expand your setup, consult our full support resources or reach out to Next Lock customer service. Welcome to a smarter, safer home!

